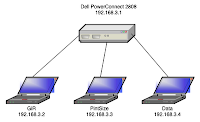
 So I ordered a Dell PowerConnect switch for my home lab setup - the specs were pretty sweet, and the push button web console made it sounds like it'd be a nice plug-n-play network for my development and testing work... then the cold reality of poor end user documentation bit me :(
 - Press the "Managed Mode" pin hole button (use a paper clip). You'll see the managed mode light flicker on.
- Configure your PC to use 192.168.2.100 as it's IP address.
- Login into 192.168.2.1 and use 'admin' with no password to access the system (guide says admin/admin).
- On the web console select System > IP Interface Parameters.
- In the presented form enter "192.168.3.1" with "255.255.255.0" as the mask, then click apply.
- To continue using the web console you now need to change your PC's IP address to 192.168.3.100.
- Once the switch has picked up that your PC's adapter is on 192.168.3.100 you'll be able to log in again to the web console. Continue configuring as required, subsequent logins can happen from any machine on the 3.x network.
The above procedure was gleamed from reading forum posts around the web, and has been reflected into Dell's online docs for the switch. To be clear, now that the switch is configured properly it purrs like a kitten (Jumbo frames, 1Mbit packet buffer memory, priority queues, etc, etc) - I'm nerding out now playing with settings. I'm still happy with the switch, I just would have liked the printed documentation to make it a little clearer how to set up via the web console instead of searching the webs for solutions.
No comments:
Post a Comment